
This post is a tutorial for loading data with FastAI. The interface has changed a lot since I originally wrote a FastAI data tutorial, so I deleted that one and I’m starting from scratch and making a brand new one. I’ll try to keep this up-to-date with the latest version. FastAI seems to be quite stable at the moment, so hopefully this will continue to work with the latest version.
Table of Contents
- Creating the DataBlock
- DataLoaders
- Creating New DataBlocks
- Oversampling
- Normalizing
- Exploring DataLoaders
- Exploring a DataLoader
There are already tutorials on the website for how to work with the provided data, so I thought I would talk about how to work with data that is saved on your disk. We’ll use the Kangaroos and Wallabies dataset that I discuss in this post.
To start with, we do the standard FastAI imports.
import inspect

from fastai.data.all import *
from fastai.vision.all import *
from pyxtend import struct
To generate a dataset, you’ll need to create a DataBlock and a DataLoader. The DataBlock is the first and main thing required to generate a dataset. DataBlocks don’t contain any data; they are just a pipeline of what to do with the data, like how to load it. I think of the DataBlock as a DataPipeline. DataBlocks are the building blocks of DataLoaders.
path = Path(os.getenv('DATA')) / r'KangWall512Split'
First, you’ll need to specify what the input and labels look like. For standard use-cases the tools you need are already built into FastAI. For image data, you use an ImageBlock and for categorical labels you use a CategoryBlock.
blocks = ImageBlock, CategoryBlock
You’ll need to tell it where to get your items. fastai comes with a nice little function, get_image_files, that makes pulling files from a disk easy.
all_images = get_image_files(path)
all_images[:5]
(#5) [Path('I:/Data/KangWall512Split/train/kangaroo/kangaroo-10.jpg'),Path('I:/Data/KangWall512Split/train/kangaroo/kangaroo-1000.jpg'),Path('I:/Data/KangWall512Split/train/kangaroo/kangaroo-1001.jpg'),Path('I:/Data/KangWall512Split/train/kangaroo/kangaroo-1002.jpg'),Path('I:/Data/KangWall512Split/train/kangaroo/kangaroo-1003.jpg')]
Then, we need to explain how to get the label. In our case, the label name come right from the folder name. fastai has a function called parent_label that makes this easy.
parent_label(all_images[0])
'kangaroo'
Then, you can add a method to split between train and validation data.
splitter = GrandparentSplitter('train', 'val')
If your splitter isn’t working, it can be hard to debug. So before we put it into the DataBlock, let’s test it out.
struct(splitter(all_images))
{tuple: [{list: [int, int, int, '...3094 total']},
  {list: [int, int, int, '...886 total']}]}
It returns a tuple of a list of train indices and a list of val indices. Perfect!
Creating the DataBlock
Putting it all together, it will look like this:
dblock = DataBlock(blocks    = blocks,
                   get_items = get_image_files,
                   get_y     = parent_label,
                   splitter  = splitter,
                   item_tfms = Resize(224))
The best way to see if you have made a valid DataBlock is to use the .summary() method. Note that we haven’t actually told it where our images are on disk. That’s because a DataBlock exists irrespective of underlying images. You will pass it a path of images to use it.
dblock.summary(path)
Setting-up type transforms pipelines
Collecting items from I:\Data\KangWall512Split
Found 4716 items
2 datasets of sizes 3094,886
Setting up Pipeline: PILBase.create
Setting up Pipeline: parent_label -> Categorize -- {'vocab': None, 'sort': True, 'add_na': False}

Building one sample
  Pipeline: PILBase.create
    starting from
      I:\Data\KangWall512Split\train\kangaroo\kangaroo-10.jpg
    applying PILBase.create gives
      PILImage mode=RGB size=512x512
  Pipeline: parent_label -> Categorize -- {'vocab': None, 'sort': True, 'add_na': False}
    starting from
      I:\Data\KangWall512Split\train\kangaroo\kangaroo-10.jpg
    applying parent_label gives
      kangaroo
    applying Categorize -- {'vocab': None, 'sort': True, 'add_na': False} gives
      TensorCategory(0)

Final sample: (PILImage mode=RGB size=512x512, TensorCategory(0))


Collecting items from I:\Data\KangWall512Split
Found 4716 items
2 datasets of sizes 3094,886
Setting up Pipeline: PILBase.create
Setting up Pipeline: parent_label -> Categorize -- {'vocab': None, 'sort': True, 'add_na': False}
Due to IPython and Windows limitation, python multiprocessing isn't available now.
So `number_workers` is changed to 0 to avoid getting stuck
Setting up after_item: Pipeline: Resize -- {'size': (224, 224), 'method': 'crop', 'pad_mode': 'reflection', 'resamples': (2, 0), 'p': 1.0} -> ToTensor
Setting up before_batch: Pipeline:
Setting up after_batch: Pipeline: IntToFloatTensor -- {'div': 255.0, 'div_mask': 1}

Building one batch
Applying item_tfms to the first sample:
  Pipeline: Resize -- {'size': (224, 224), 'method': 'crop', 'pad_mode': 'reflection', 'resamples': (2, 0), 'p': 1.0} -> ToTensor
    starting from
      (PILImage mode=RGB size=512x512, TensorCategory(0))
    applying Resize -- {'size': (224, 224), 'method': 'crop', 'pad_mode': 'reflection', 'resamples': (2, 0), 'p': 1.0} gives
      (PILImage mode=RGB size=224x224, TensorCategory(0))
    applying ToTensor gives
      (TensorImage of size 3x224x224, TensorCategory(0))

Adding the next 3 samples

No before_batch transform to apply

Collating items in a batch

Applying batch_tfms to the batch built
  Pipeline: IntToFloatTensor -- {'div': 255.0, 'div_mask': 1}
    starting from
      (TensorImage of size 4x3x224x224, TensorCategory([0, 0, 0, 0], device='cuda:0'))
    applying IntToFloatTensor -- {'div': 255.0, 'div_mask': 1} gives
      (TensorImage of size 4x3x224x224, TensorCategory([0, 0, 0, 0], device='cuda:0'))
Once you’ve got a DataBlock, you can convert it into either a dataset using dblock.datasets or a dataloader using dblock.dataloaders. In this case, we’ll do the DataLoader.
DataLoaders
Because your DataBlock knows how to feed data into the model (i.e. it knows the batch size, transforms, etc.), creating DataLoaders from a DataBlock is trivially simple - all you do is pass a data source. This can be a path, a list of images, numpy arrays, or whatever else you want. It’s whatever you want passed to the get_items function.
dls = dblock.dataloaders(path)
Due to IPython and Windows limitation, python multiprocessing isn't available now.
So `number_workers` is changed to 0 to avoid getting stuck
You might think that’s not enough information to know how to load the data, and you’re right. For example, we haven’t told it what batch size to use. But instead of making these required arguments, fastai sets reasonable defaults for you so you can always adjust them, but if you just want to try something, it doesn’t slow you down. If you’re curious, the default batch size is 64.
dls.bs
64
type(dls)
fastai.data.core.DataLoaders
The DataLoaders class is interesting. I had assumed it was inherited from the PyTorch DataLoader, but that’s not the case.
inspect.getmro(DataLoaders)
(fastai.data.core.DataLoaders, fastcore.basics.GetAttr, object)
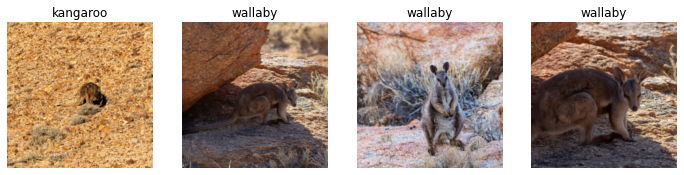
dls.train.show_batch(max_n=4, nrows=1)
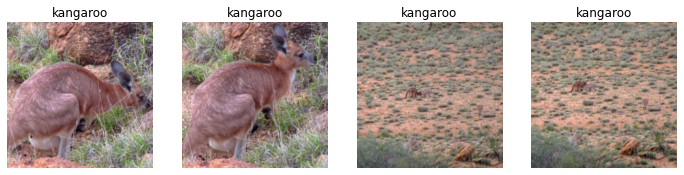
dls.valid.show_batch(max_n=4, nrows=1)
We can get an example of a batch like so:
images, labels = first(dls.train)
Let’s look at the shape to make sure it’s what we expect. PyTorch uses channels first, so it should be N X C X H X W.
print(images.shape, labels.shape)
torch.Size([64, 3, 224, 224]) torch.Size([64])
Creating New DataBlocks
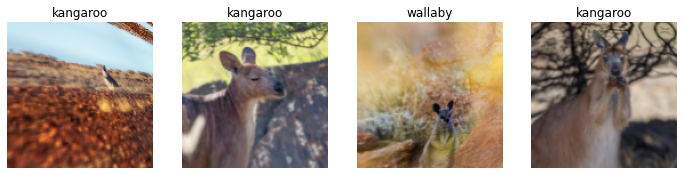
It’s easy to create new DataBlocks. Let’s say you want to add some transformations. Here’s one way to do that.
dblock = dblock.new(item_tfms=Resize(128, ResizeMethod.Pad, pad_mode='zeros'), batch_tfms=aug_transforms(mult=2))
dls = dblock.dataloaders(path)
dls.train.show_batch(max_n=4, nrows=1)
Due to IPython and Windows limitation, python multiprocessing isn't available now.
So `number_workers` is changed to 0 to avoid getting stuck
Oversampling
Let’s also say we wanted to add oversampling to the train set. Here’s how we do that. First, let’s see how many more we have of one type than the other.
train_files = get_image_files(path / 'train')
val_files = get_image_files(path / 'val')
wallaby_files = [f for f in train_files if 'wallaby' in str(f)]
kangaroo_files = [f for f in train_files if 'kangaroo' in str(f)]
len(wallaby_files), len(kangaroo_files)
(1242, 1852)
Now let’s say we want to double the number of wallaby files.
oversampled_files = wallaby_files * 2 + kangaroo_files
len(oversampled_files), len(val_files)
(4336, 886)
OK, now we’ve got 5118 files and these are all train files. Fortunately, the same splitter that we used before will work here, so we can use that.
dblock = DataBlock(blocks    = blocks,
                   get_items = get_image_files,
                   get_y     = parent_label,
                   splitter  = GrandparentSplitter('train', 'val'),
                   item_tfms = Resize(224))
Normalizing
means = [x.mean(dim=(0, 2, 3)) for x, y in dls.train]
stds = [x.std(dim=(0, 2, 3)) for x, y in dls.train]
mean = torch.stack(means).mean(dim=0)
std = torch.stack(stds).mean(dim=0)
print(mean, std)
TensorImage([0.5279, 0.4788, 0.4261], device='cuda:0') TensorImage([0.2345, 0.2232, 0.2285], device='cuda:0')
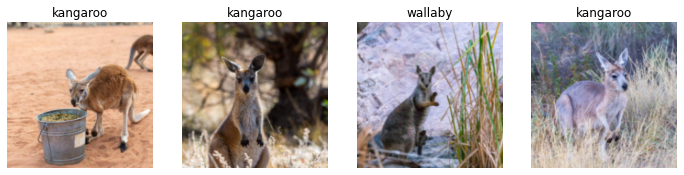
augs = [RandomResizedCropGPU(size=224, min_scale=0.75), Zoom()]
augs += [Normalize.from_stats(mean, std)]
dblock = DataBlock(blocks    = blocks,
                   get_items = get_image_files,
                   get_y     = parent_label,
                   splitter  = GrandparentSplitter('train', 'val'),
                   item_tfms = Resize(224),
                   batch_tfms=augs)
dls = dblock.dataloaders(path)
dls.train.show_batch(max_n=4, nrows=1)
Due to IPython and Windows limitation, python multiprocessing isn't available now.
So `number_workers` is changed to 0 to avoid getting stuck
Exploring DataLoaders
Let’s look in more detail at the dataloaders. First, what kind of object are they?
dls
<fastai.data.core.DataLoaders at 0x290a140cd90>
The DataLoaders class is a wrapper around multiple DataLoader classes. This is particularly useful when using a train and a test set. Let’s see what DataLoaders we have here.
dls.loaders
[<fastai.data.core.TfmdDL at 0x290804d9610>,
 <fastai.data.core.TfmdDL at 0x290a94b8220>]
Dataloaders don’t have a len, so you’ll have to specify which subset to see the length of.
len(dls.train.items), len(dls.valid.items)
(3094, 886)
Exploring a DataLoader
Now let’s look at a single DataLoader.
dl = dls.loaders[0]
dl
<fastai.data.core.TfmdDL at 0x290804d9610>
inspect.getmro(DataLoader)
(fastai.data.load.DataLoader, fastcore.basics.GetAttr, object)
It’s a good idea to inspect your DataLoader a bit to see that it’s working. Here are some ways.
# check the batch size
dl.bs
64
dl.device
device(type='cuda', index=0)
dl.dataset
(#3094) [(PILImage mode=RGB size=512x512, TensorCategory(0)),(PILImage mode=RGB size=512x512, TensorCategory(0)),(PILImage mode=RGB size=512x512, TensorCategory(0)),(PILImage mode=RGB size=512x512, TensorCategory(0)),(PILImage mode=RGB size=512x512, TensorCategory(0)),(PILImage mode=RGB size=512x512, TensorCategory(0)),(PILImage mode=RGB size=512x512, TensorCategory(0)),(PILImage mode=RGB size=512x512, TensorCategory(0)),(PILImage mode=RGB size=512x512, TensorCategory(0)),(PILImage mode=RGB size=512x512, TensorCategory(0))...]
Let’s see what it spits out.
item = next(iter(dl))
# note that you could also do dl.one_batch()
len(item)
2
It’s got two items - the first is a PyTorch Tensor and the second is the label.
type(item[0])
fastai.torch_core.TensorImage
type(item[1])
fastai.torch_core.TensorCategory
item[0].shape
torch.Size([64, 3, 224, 224])
There’s a default batch size of 64, so that’s why we have 64 items.
item[1]
TensorCategory([0, 0, 0, 1, 0, 1, 0, 0, 0, 0, 0, 1, 0, 0, 0, 1, 1, 0, 0, 0, 1, 1, 1, 0,
        0, 0, 0, 0, 0, 0, 0, 0, 1, 0, 1, 0, 0, 1, 0, 1, 1, 0, 1, 0, 1, 0, 0, 0,
        0, 1, 0, 1, 0, 0, 0, 0, 0, 0, 1, 0, 0, 0, 0, 0], device='cuda:0')