
In this series of posts, I will show how to build an image classifier using your own dataset. We’ll discuss how to prepare a dataset for machine learning, how to build a model to classify it, and techniques to improve the model’s performance. This post will focus on the data preparation.
Table of Contents
- Introduction
- Directories
- Similar Images
- Metadata
- Removing Bad Data
- Splitting the Data by Date
- Repeat for Other Class
- Next steps
Introduction
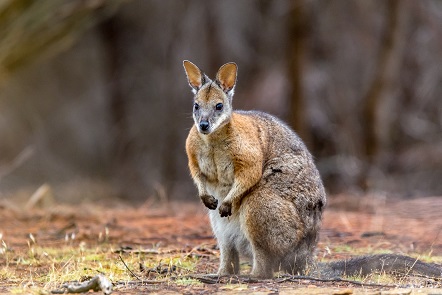
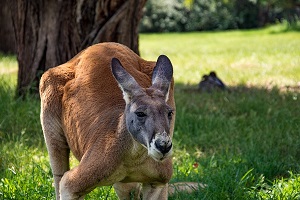
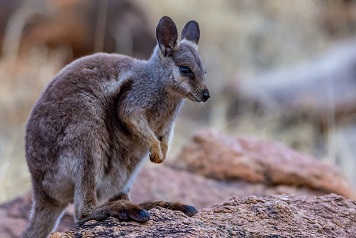
I’ll be using images of kangaroos and wallabies that I’ve taken, but these techniques should work well with any kind of images. Distinguishing kangaroos and wallabies is actually somewhat tricky because they often look similar. In fact, there isn’t a clear phylogenetic boundary between the two. It’s simply that the smaller ones - those where the adult males generally weigh less than 20 kg and have feet less than 25 centimeters - are called “wallabies”, and the larger ones are called “kangaroos”. In fact, some wallabies are more closely related to kangaroos than they are to other wallabies. This tammar wallaby (top) is more closely related to this red kangaroo (middle) than to the black-footed rock wallaby (bottom).
OK, let’s get started with the directory structure.
Directories
To start, I have all of my kangaroo images in one folder and all my wallaby images in another. The next step is to split them up into training, validation, and testing sets.
Here is the directory structure. We’re starting with this:
original_data
│
└───kangaroos
│         kangaroo1.jpg
│         kangaroo2.jpg
└───wallabies
          wallaby1.jpg
          wallaby2.jpg
We want to end with this:
data
│
└───train
│   └───kangaroos
│   │     kangaroo1.jpg
│   │     kangaroo2.jpg
│   └───wallabies
│         wallaby1.jpg
│         wallaby2.jpg
└───valid
│   └───kangaroos
│   │     kangaroo3.jpg
│   │     kangaroo4.jpg
│   └───wallabies
│         wallaby3.jpg
│         wallaby4.jpg
└───test
    └───kangaroos
    │     kangaroo5.jpg
    │     kangaroo6.jpg
    └───wallabies
          wallaby5.jpg
          wallaby6.jpg
We’ll start by importing some libraries and providing the locations where the data are and where we want it to be. We’ll use the a tool I wrote called DataMaster for preparing images, which helps in presenting the data in the way we need it.
import os
import random
from collections import Counter
from pathlib import Path
from shutil import copyfile

import numpy as np
from PIL import Image

from cv.data.data_prep.data_master import DataMaster
path = Path(os.getenv('DATA')) / 'KangWall512'
kang_path = path / 'kangaroo'
wall_path = path / 'wallaby'
new_path = Path(os.getenv('DATA')) / 'KangWall512Split'
kang_train_path = new_path / 'train' / 'kangaroo'
wall_train_path = new_path / 'train' / 'wallaby'
kang_val_path = new_path / 'val' / 'kangaroo'
wall_val_path = new_path / 'val' / 'wallaby'
kang_test_path = new_path / 'test' / 'kangaroo'
wall_test_path = new_path / 'test' / 'wallaby'
data_master = DataMaster()
Similar Images
In an ideal world, all the images in a dataset would be “equal” in the sense that they’re all the same quality and equally different from the others, or at least if they’re unequal, the “unequalness” is randomly scattered throughout the dataset. But this isn’t an ideal dataset; it’s a real one, so we have to account for a variety of possible issues.
Usually when I photograph animals I take a series of photos in a row to make sure I get at least one good one. This means that I have many photos taken within seconds of each other, resulting in nearly identical images.
Let’s take a look at an examples of two photos.
kangaroo_files = data_master.get_filenames(kang_path)
similar_files = [kang_path / kangaroo_files[6], kang_path / kangaroo_files[7]]
similar_images = [Image.open(img) for img in similar_files]
combined_images = np.hstack([np.asarray(img) for img in similar_images])
Image.fromarray(combined_images)
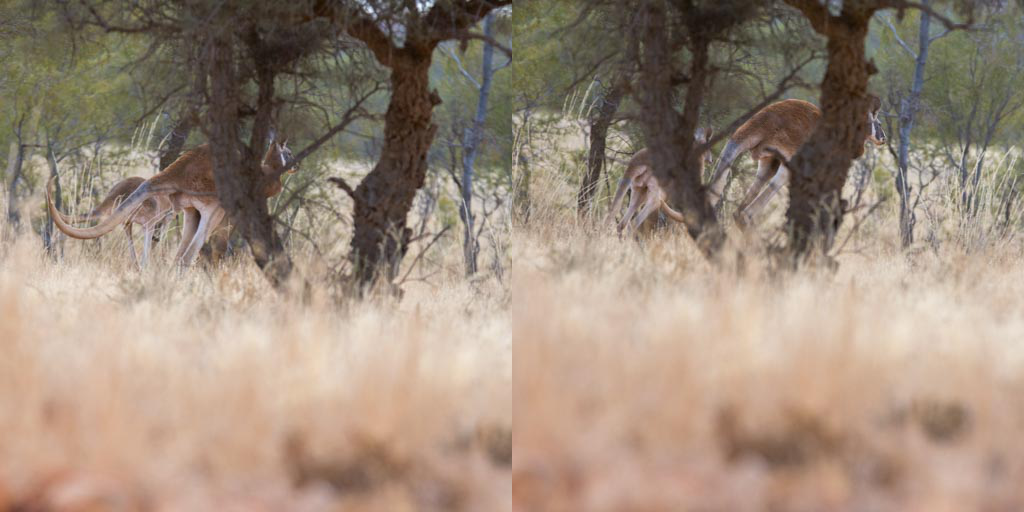
These are almost identical. We could just take one from each similar group of photos, but having nearly identical images isn’t always a bad thing. In fact, it can be useful because there will be small variations in the background and specific pixel locations, but the subject is the same. That helps the model learn what is and isn’t important in the image.
One thing I like about this dataset is that it is real world data, and some real world datasets are going to contain points that are nearly (or are) identical to each other. It doesn’t look like CIFAR-10, but there are lots of datasets like that, so maybe being different is a good thing. So we’re going to keep them in.
This presents a problem, however, for splitting the data into training, validating, and testing sets, as we can’t have nearly identical images in different splits. This is known as data leakage and would allow our model to overfit on superfluous details and, because those same superfluous details are in the validate and test sets, appear to be better than it really is.
To separate them, we’ll have to separate the images by date, so all the images taken on one day go to one of the data splits. One way to do that would be to put all the images taken before some date in the training set, then validate and test on sets taken later. But that creates another problem. The first picture I took doesn’t look much like the most recent pictures. The first photos were taken with my phone and the later ones with a real camera and I (hope) I have improved as a photographer as well. We don’t want to train on a bunch of crappy images and test on good ones, so we’ll have to mix it up.
im = Image.open(os.path.join(kang_path, kangaroo_files[0]))
im
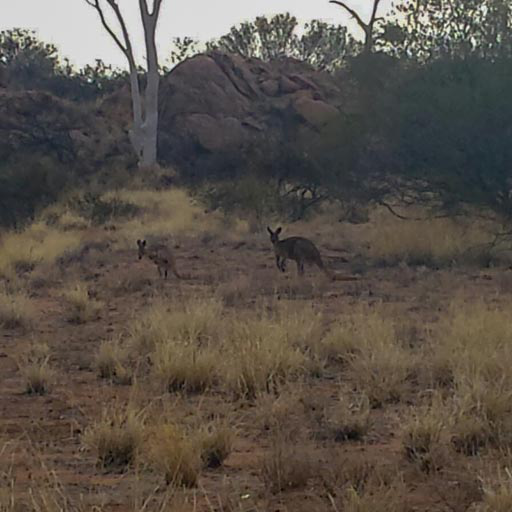
My first picture of a kangaroo, which was taken with my phone.
To split the images by date, we’ll have to look into the metadata.
Metadata
There’s a lot of information hidden in image metadata. Time, location, and equipment are often embedded in there. Let’s take a look in there by calling _getexif().
Image.open(kang_path / kangaroo_files[1000])._getexif()
{296: 2,
 34665: 212,
 271: 'samsung',
 272: 'SCH-I545',
 305: 'Adobe Photoshop Lightroom Classic 9.3 (Windows)',
 306: '2022:01:08 15:38:06',
 282: 240.0,
 283: 240.0,
 36864: b'0231',
 37377: 8.965784,
 37378: 2.275007,
 36867: '2016:03:06 13:34:41',
 36868: '2016:03:06 13:34:41',
 37379: 7.1953125,
 37380: 0.0,
 37381: 2.28,
 37383: 1,
 37384: 0,
 37385: 0,
 37386: 4.2,
 37510: b'ASCII\x00\x00\x00METADATA-START',
 40961: 1,
 41989: 31,
 41990: 0,
 36880: '-08:00',
 41495: 2,
 33434: 0.002,
 33437: 2.2,
 41729: b'\x00',
 34850: 2,
 34855: 50,
 41986: 0,
 41987: 0}
Unfortunately, the keys are not easily understandable. Some you can guess but others aren’t so clear. To find out why they mean check out this reference on image metadata.
Going through the metadata is kind of fun. You can actually see my evolution in cameras in the metadata, starting with using my phone and ending with a Nikon D7200.
for i in [1, 13, 100]:
    print(Image.open(os.path.join(kang_path, kangaroo_files[i]))._getexif()[272])
SCH-I545
Canon PowerShot SX610 HS
NIKON D7200
I’ve noticed that the metadata can be inconsistent and the date we’re looking for isn’t in every image. We’ll have to find and remove the images without the date.
Removing Bad Data
Some of the files don’t have all the required information. We’ll have to remove those.
def remove_files_without_dates(path, list_of_files):
    dates = []
    no_date = []
    for i in range(len(list_of_files)):
        im = Image.open(path / list_of_files[i])
        if 36867 in im._getexif():
            # Because they're in the same format each time, we can do this which is faster than re
            dates.append(im._getexif()[
                         36867][0:4] + im._getexif()[36867][5:7] + im._getexif()[36867][8:10])
        else:
            no_date.append(list_of_files[i])
    print(f"{len(no_date)} file(s) were missing dates and will not be used")
    good_files = [file for file in list_of_files if file not in no_date]
    return dates, good_files
kangaroo_file_dates, good_kangaroo_files = remove_files_without_dates(kang_path, kangaroo_files)
2 file(s) were missing dates and will not be used
Lots of datasets will have incorrectly labeled data, so it’s a good practice to look through the dataset to ensure that the images are correctly labeled. I hand labeled this dataset, and gone through a few rounds of error correction so I believe it is accurate.
Now that we’re done cleaning, let’s see how many images we have left.
print(len(good_kangaroo_files))
2870
Nice! We’ll have a few thousand images to work with.
Splitting the Data by Date
Let’s build a function that finds the number of images in a day and assigns them to one of the data sets. We’ll tell it how big each set should be and the function will tell us what days to include in that set.
def split_days(list_of_dates, validation_set_size, test_set_size, seed=None):
    # See how many images are in each date
    counts = Counter(list_of_dates)
    validation_set_cutoff = int(sum(counts.values()) * validation_set_size)
    test_set_cutoff = int(sum(counts.values()) * test_set_size)

    # shuffle the values
    list_of_counts = list(counts.items())
    random.seed(seed)
    random.shuffle(list_of_counts)

    # Create empty data structures
    num_images_in_validation_set = 0
    num_images_in_test_set = 0
    nth_element_of_list = 0
    validation_dates = []
    test_dates = []

    # add dates to the test set until you have reached the cutoff
    for i, date_count_tuple in enumerate(list_of_counts):
        if num_images_in_validation_set < validation_set_cutoff:
            # Add the date to list of dates in this set
            validation_dates.append(date_count_tuple[0])
            # keep track of how many have been added
            num_images_in_validation_set += date_count_tuple[1]
        elif num_images_in_test_set < test_set_cutoff:
            # If the validate set is full, start on the test set
            test_dates.append(date_count_tuple[0])
            # keep track of how many have been added
            num_images_in_test_set += date_count_tuple[1]
        else:
            # both sets are full, no need to continue
            break
    return validation_dates, test_dates
Now we’ll set the size of the train, validate, and test sets. We want to make training set as large as possible given the constraint that the variance in our validation and tests sets is low enough to be meaningful. The lower the variance, the more confidence we can have in our results. With only a few thousand images, we already don’t have as much data as we would like. To keep the validation and test sets large enough to be useful, I think we should make them about 15% of our data each. That leaves the other 70% for training.
# Set the size of the validation and test sets
validation_set_size = 0.15
test_set_size = 0.15
kangaroo_validation_dates, kangaroo_test_dates = split_days(kangaroo_file_dates, validation_set_size, test_set_size)
Now that we’ve found which dates go in the test set, we’ll copy all our images into training and testing folders.
def copy_files(original_path, train_path, validate_path, test_path, files, validate_dates, test_dates):
    os.makedirs(train_path, exist_ok=True)
    os.makedirs(validate_path, exist_ok=True)
    os.makedirs(test_path, exist_ok=True)

    for file in files:
        im = Image.open(os.path.join(original_path, file))

        if im._getexif()[36867][0:4] + im._getexif()[36867][5:7] + im._getexif()[36867][8:10] in validate_dates:
            # move to validate set
            copyfile(os.path.join(original_path, file),
                     os.path.join(validate_path, file))
        elif im._getexif()[36867][0:4] + im._getexif()[36867][5:7] + im._getexif()[36867][8:10] in test_dates:
            # move to test set
            copyfile(os.path.join(original_path, file),
                     os.path.join(test_path, file))
        else:
            # move to train set
            copyfile(os.path.join(original_path, file),
                     os.path.join(train_path, file))
copy_files(kang_path, kang_train_path, kang_val_path, kang_test_path,
           good_kangaroo_files, kangaroo_validation_dates, kangaroo_test_dates)
Repeat for Other Class
Now let’s do the same thing with the wallaby images.
wallaby_files = data_master.get_filenames(wall_path)
wallaby_file_dates, good_wallaby_files = remove_files_without_dates(
    wall_path, wallaby_files)
1 file(s) were missing dates and will not be used
wallaby_validation_dates, wallaby_test_dates = split_days(
    wallaby_file_dates, validation_set_size, test_set_size)
copy_files(wall_path, wall_train_path, wall_val_path, wall_test_path,
           good_wallaby_files, wallaby_validation_dates, wallaby_test_dates)
print(len(good_wallaby_files))
1846
There are more images of kangaroos than wallabies, so the datasets will be unbalanced. That won’t be a problem as long as we take it into consideration when we measure the quality of the model.
Next steps
Now that we’ve cleaned up our dataset, we can build a model. In the next notebook, we’ll look at how we can train a model to classify the images.