This post is a quick walkthrough of the different data augmentation methods available in Detectron2 and their utility for augmenting overhead imagery. I’ll also go over a quick way to implement them.
Data Augmentation Methods
Detectron2 has a large list of available data augmentation methods. Let’s go over them.
RandomApply
This is a wrapper around the other augmentation methods so that you can turn a list of them on or off as a group with a specified probability. I don’t generally use it for my purposes, but it could be helpful in some cases.
RandomFlip
You can only flip horizontally or vertically, so for overhead imagery, you should include two of these, one for each. You can specify the probability. I don’t see any reason not to use 0.5.
Resize and ResizeShortestEdge
There are two resize options. If your images vary in shape and you don’t want to distort them, ResizeShortestEdge is the one to use because it won’t change the image’s aspect ratio. It increases the size (preserving the aspect ratio) until the shortest edge matches the value you specify. Then it checks if the longest edge is larger than the limit. If so, it then reduces the image to fit. This means that the shortest side may be shorter than the value you provided, which is a little counterintuitive, but on the plus side, you can make sure your images aren’t too long (or just not provide a maximum value).
One thing I don’t like about this is that it upsamples different images differently, depending on their shape
RandomRotation
This does exactly what it sounds like. You pass it a list of [min_angle, max_angle] and it randomly chooses a value. This can be useful for overhead imagery because your object are usually rotation-invariant. However, you have to be careful when rotating an image, especially for object detection. If you rotate an image, it will by default preserve all the information in the original image by adding black padding to all the corners. Therefore the actual image size increases, and if you’re not-rotated image batch fills up your GPU, rotating the image can cause it to run out of memory. To prevent this, you can do RandomRotation(45, expand=False). However, this will clip the corners of your original image, so you will lose information.
I mentioned that you need to be careful when using this especially for object detection, and that’s because the same thing that happens to the image happens to your bounding boxes. That is, as you rotate the box it will necessarily increase in size, so the boxes will become less precisely localized around your object. I still think this has a place for overhead imagery but I recommend using small angles.
RandomCrop
Cropping is supported by default in the configuration files so I prefer to do it there and leave this alone.
RandomExtent
This crops a random “subrect” of the image. So far I haven’t used it.
RandomContrast, RandomBrightness, and RandomSaturation
These are all pretty straightforward. You can provide them ranges of the form (min, max) where the value 1 is an identity function (no change). These augmentations are very important in cases where different classes might have variation in one of these. If all the pictures of cats were taken in brighter rooms than all the pictures of dogs, then it would be important to use a light of RandomBrightness so the brightnesses of the classes overlap, forcing the model to actually learn the classes and not just some shortcut. Even in the case when the classes are from the same distribution, these are still good data augmentation techniques.
RandomLighting
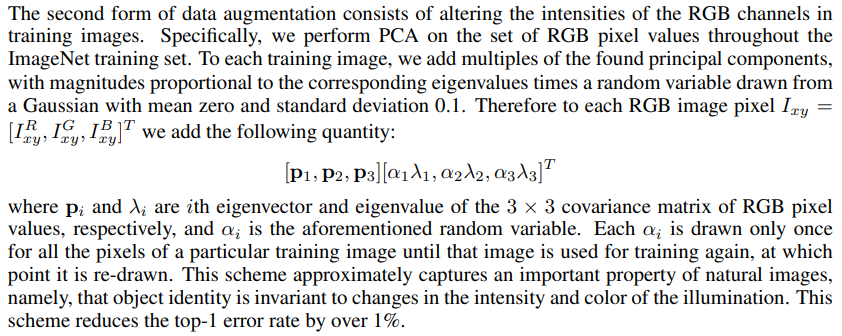
What this does is a bit tricky. It uses a PCA lighting trick that was used in AlexNet with great results. Here’s the relevant section of the paper:

It takes scale as an argument, and I’m sure what a good value for the scale is, but I will update this once I get a good feel for it.
Implementation
Fortunately, Detectron2 makes implementation super easy. There are a few different ways to do it, but I would start by copying their DatasetMapper and tweaking it. You could subclass it but it’s only a simple class with an __init__ and __call__ method, so I just copy the whole thing.
From there, you have two options. One is to add the transforms to the config file, and the other is to simply extend the transforms through code. Extending it through code is faster but the config option makes it much easier to save your settings.
Either way, you’ll need to find in the DatasetMapper the line that builds the transforms. It should look something like:
self.tfm_gens = utils.build_transform_gen(cfg, is_train)
If you’ve added your augmentation methods to the config, you’re already done. If not, you just need to add them here:
self.tfm_gens.extend(augmentations)
Then you need to pass the augmentations you want to use into the DatasetMapper. Make sure to pass the augmentation to your trainer (subclass the DefaultTrainer) and pass in your mapper. Here’s an example of what my tranforms look like for an overhead imagery dataset.
from detectron2.data import transforms as T
train_augmentations = [
    T.RandomBrightness(0.5, 2),
    T.RandomContrast(0.5, 2),
    T.RandomSaturation(0.5, 2),
    T.RandomFlip(prob=0.5, horizontal=True, vertical=False),
    T.RandomFlip(prob=0.5, horizontal=False, vertical=True),
]